
Lab 5: Motion Planning
This page is obsolete.
Introduction
In this lab you will use a graphical environment to test different motion planning techniques. You will use OMPL, the Open Motion Planning Library, which comes both for integration into existing projects as well as with a graphical interface to visualize planning. More information about OMPL can be found on the OMPL homepage via the link below.
Updates and Known Problems
Any problems discovered during the lab, and any clarifications we make to
the lab instructions, will be announced here.
Resources
The following resources are available:
- OMPL homepage - here you can find all available informaion on OMPL.
- GUI description - Getting started with the GUI.
- OMPL primer - this pdf contains a concise introduction to OMPL. It goes through some theory behind motion planning and how to get started with OMPL.
Running OMPL
OMPL is started by executing
/sw/local/bin/omplapp
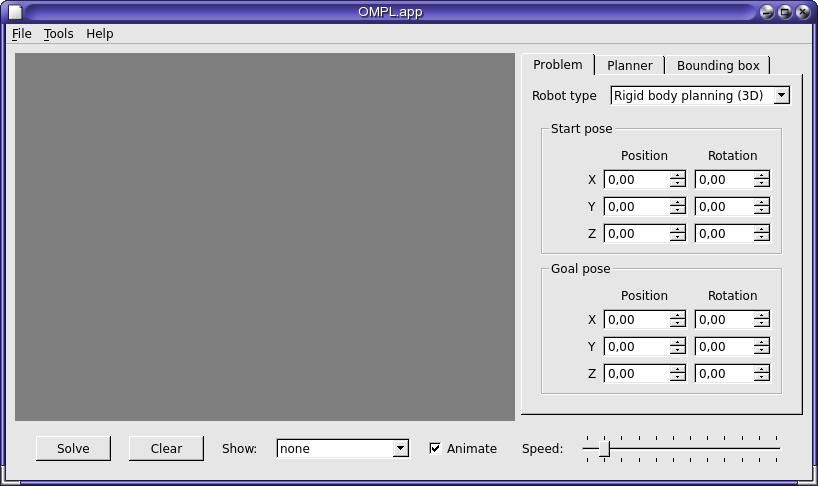
If you want to run OMPL from home you have two options. Either install it locally or run it remote via ssh. We cannot however offer support for these options and hence recommend that you carry out the lab in the PULs. When you start OMPL.app which is the graphical interface of OMPL you will see something like this:
Lab 5.1 Theory: Spaces and robots
The answers to the questions in the theory part should be
motivated and included in your final report.
- What is the difference between Configuration Space and Work
Space?
- Which is used when searching for a plan? Why is it
used?
- What are the formal requirements for a robot to be considered
holonomic?
Lab 5.2: Comparing Planners
Start OMPL.app. In this part we will take a look at some different types of motion planners and compare their approaches. OMPL comes with many resources in the form of maps and robots.
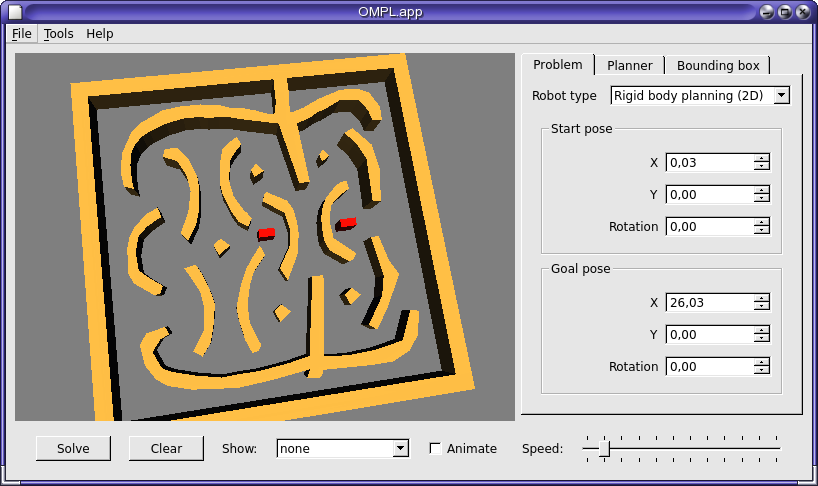
For simplicity we will use 2D maps and robots although the gui always renders the image in 3D. To get 2D planning set the "robot_type" to "Rigid body planning (2D)". The mentioned resources are found in
/sw/omplapp-1.0.0/share/ompl/resources/2D
Start with loading the Maze_planar_env.dae and add
the hook_planar_robot.dae. This map is relatively complex
for the planner and the robot is also increasing the complexity by
its form and size. Before you can start planning you need to
select a start and a goal location. Note that you can zoom in/out
with the mouse wheel and if needed, rotate the map by dragging the
mouse while holding a button pressed.
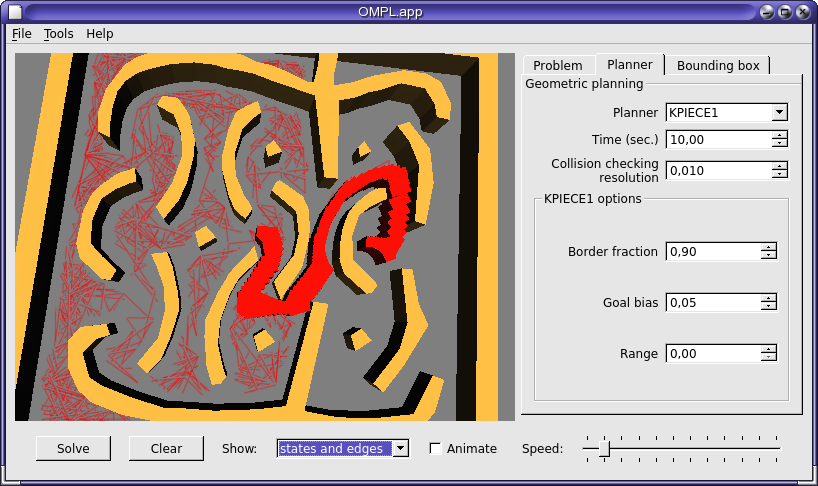
Now, select the RRTstar planner to get
your first plan in OMPL. After a plan is found you can choose to
have it animated step by step or shown. You can also show states and
edges between states to see which states and paths the planner
generated.
For the rest of the lab, select one more map which you think will
capture another different aspect of motion planning. Then use the
following information
to select at least 1 planner in addition to RRTstar and PRM that you run on the same
problems. In the report, write which you have chosen and describe
how it, RRTstar and PRM work in general terms.
Report your findings when it
comes to plan quality, generated states and time used by the
planner. Planner statistics can be found in the log window, started
via Tools->Log window or CTRL+1. It is important that you add
screenshots (states and edges and no animations) to the report so
that the lab assistant can follow your
reasoning. Note that random planners will generate different plans
each time so don't forget to screenshot (alt-print sceen) before you
move on. Finally, save the paths and calculate the distance moved
and the total rotation done by running
the distance calculator python
script on the path file.
If the planner takes considerably longer time than allowed by the time
limit it may have crashed. Therefore, it is always a good idea to check the
output in the logwindow.
Note: With two maps and three planners you will have at least 6 results to dicsuss in the report.
Finishing and handing in the results
When you have finished the lab, you need to demonstrate and discuss the
results with your lab assistant.
After the demonstration and discussion, you should hand in your results:
-
Create a single ZIP file, named fffll111-fffll222-lab5.zip where
fffll111 and fffll222 are your login names (assuming you are working in
pairs).
-
The ZIP file should contain all pictures and saved plans as well as the report as a simple text file or as a PDF document (no Word or OpenOffice documents, please).
-
Send the ZIP file by e-mail to Mikael
Nilsson.
Page responsible: Jonas Kvarnstr�m
Last updated: 2019-03-18
Introduction
In this lab you will use a graphical environment to test different motion planning techniques. You will use OMPL, the Open Motion Planning Library, which comes both for integration into existing projects as well as with a graphical interface to visualize planning. More information about OMPL can be found on the OMPL homepage via the link below.
Updates and Known Problems
Any problems discovered during the lab, and any clarifications we make to the lab instructions, will be announced here.
Resources
The following resources are available:
- OMPL homepage - here you can find all available informaion on OMPL.
- GUI description - Getting started with the GUI.
- OMPL primer - this pdf contains a concise introduction to OMPL. It goes through some theory behind motion planning and how to get started with OMPL.
Running OMPL
OMPL is started by executing
/sw/local/bin/omplapp
If you want to run OMPL from home you have two options. Either install it locally or run it remote via ssh. We cannot however offer support for these options and hence recommend that you carry out the lab in the PULs. When you start OMPL.app which is the graphical interface of OMPL you will see something like this:
Lab 5.1 Theory: Spaces and robots
The answers to the questions in the theory part should be motivated and included in your final report.
- What is the difference between Configuration Space and Work Space?
- Which is used when searching for a plan? Why is it used?
- What are the formal requirements for a robot to be considered holonomic?
Lab 5.2: Comparing Planners
Start OMPL.app. In this part we will take a look at some different types of motion planners and compare their approaches. OMPL comes with many resources in the form of maps and robots. For simplicity we will use 2D maps and robots although the gui always renders the image in 3D. To get 2D planning set the "robot_type" to "Rigid body planning (2D)". The mentioned resources are found in
/sw/omplapp-1.0.0/share/ompl/resources/2D
Start with loading the Maze_planar_env.dae and add the hook_planar_robot.dae. This map is relatively complex for the planner and the robot is also increasing the complexity by its form and size. Before you can start planning you need to select a start and a goal location. Note that you can zoom in/out with the mouse wheel and if needed, rotate the map by dragging the mouse while holding a button pressed.
Now, select the RRTstar planner to get your first plan in OMPL. After a plan is found you can choose to have it animated step by step or shown. You can also show states and edges between states to see which states and paths the planner generated.
For the rest of the lab, select one more map which you think will capture another different aspect of motion planning. Then use the following information to select at least 1 planner in addition to RRTstar and PRM that you run on the same problems. In the report, write which you have chosen and describe how it, RRTstar and PRM work in general terms. Report your findings when it comes to plan quality, generated states and time used by the planner. Planner statistics can be found in the log window, started via Tools->Log window or CTRL+1. It is important that you add screenshots (states and edges and no animations) to the report so that the lab assistant can follow your reasoning. Note that random planners will generate different plans each time so don't forget to screenshot (alt-print sceen) before you move on. Finally, save the paths and calculate the distance moved and the total rotation done by running the distance calculator python script on the path file.
If the planner takes considerably longer time than allowed by the time limit it may have crashed. Therefore, it is always a good idea to check the output in the logwindow.
Note: With two maps and three planners you will have at least 6 results to dicsuss in the report.
Finishing and handing in the results
When you have finished the lab, you need to demonstrate and discuss the results with your lab assistant.
After the demonstration and discussion, you should hand in your results:
- Create a single ZIP file, named fffll111-fffll222-lab5.zip where fffll111 and fffll222 are your login names (assuming you are working in pairs).
- The ZIP file should contain all pictures and saved plans as well as the report as a simple text file or as a PDF document (no Word or OpenOffice documents, please).
- Send the ZIP file by e-mail to Mikael Nilsson.
Page responsible: Jonas Kvarnstr�m
Last updated: 2019-03-18
